
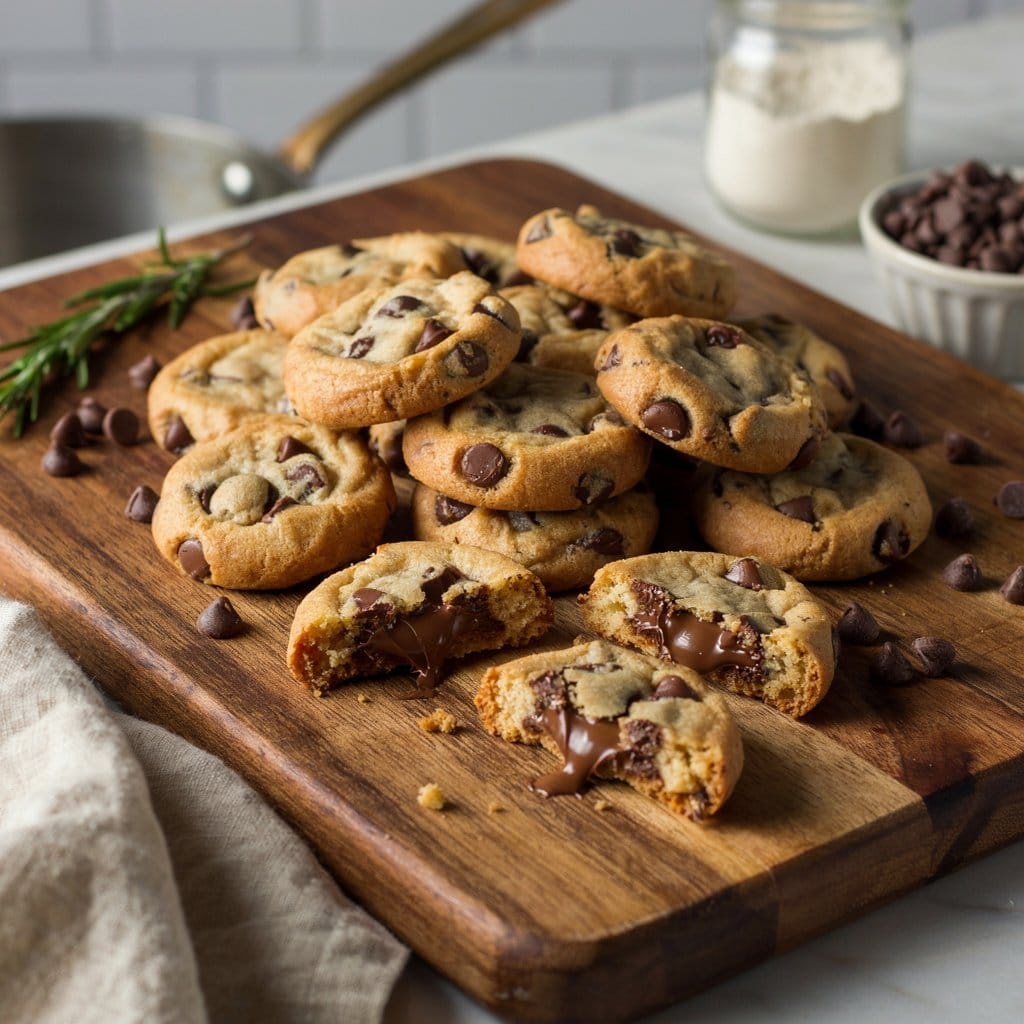
Why bother making mini chocolate chip cookies instead of the regular size? I asked myself the same thing the first time a batch of full-size chocolate chip cookies fused into one giant sheet on the tray. Cutting the dough portions down fixed the spreading problem, and the smaller size stuck around for a reason I didn’t expect – they bake more evenly, and nobody at a party ever complains about being handed a small cookie.
This guide covers what most people searching for mini chocolate chip cookies actually want: a dependable recipe, how to get a crispy texture, using a piping bag for uniform shapes, a comparison with store-bought brands like Bisconni and Moomin, and the calorie count per cookie.
Recipe Card
Mini Chocolate Chip Cookies
| Detail | Info |
|---|---|
| Prep Time | 15 minutes |
| Chill Time | 30 minutes |
| Cook Time | 9 minutes |
| Total Time | 54 minutes |
| Servings | 14 (3 cookies per serving) |
| Yield | 42 mini cookies |
| Cuisine | American |
| Course | Dessert, Snack |
| Calories | Approx. 40 kcal per cookie |
Ingredients (summary): Butter, granulated sugar, brown sugar, eggs, vanilla extract, flour, baking soda, salt, mini chocolate chips. Full measurements are listed in the Ingredients section below.
Instructions (summary): Cream the butter and sugars, mix in the eggs and vanilla, fold in the dry ingredients and chocolate chips, chill the dough, portion it onto a tray, bake at 350°F for 8-10 minutes, and cool on a wire rack. Full instructions are below.
Equipment: Mixing bowls, electric mixer, measuring cups, cookie scoop, piping bag, baking sheet, parchment paper, cooling rack.
Why Mini Chocolate Chip Cookies Are Worth Baking
Small cookies solve a problem full-size ones create: portion anxiety. Nobody hesitates before grabbing a bite size chocolate chip cookie, but a giant bakery-style one comes with an unspoken commitment. That’s really the whole appeal – no guilt, no plate needed, no reason to say no to a second one.
There’s also a practical upside. Tiny chocolate chip cookies bake in roughly half the time a full-size batch takes, which matters more than people expect when you’re trying to get something in the oven before guests arrive.
Bisconni vs Moomin: Comparing Store-Bought Options
Two packaged brands come up often in searches for mini chocolate chip cookies: Bisconni and Moomin. Neither is a substitute for homemade, but each has a distinct enough profile to be worth knowing.
Mini Chocolate Chip Cookies Bisconni
Bisconni’s version is distributed widely across Pakistan and South Asia. The texture leans crunchy, the chocolate flavor is mild, and batch-to-batch consistency is high – which is exactly what you’d expect from a mass-produced snack. What you don’t get is much chocolate per bite; the chip distribution is noticeably lighter than a homemade batch.
Mini Chocolate Chip Cookies Moomin
Moomin leans on character-themed packaging aimed at kids, but the cookie itself isn’t an afterthought. It sits somewhere between soft and crisp, with a fairly buttery flavor. It shows up often as a lunchbox item in markets where the brand has recognition.
Both brands are built for shelf life first. That’s a reasonable trade-off for convenience, but it’s also exactly why homemade remains the better option if texture and chocolate ratio matter to you.
Equipment You’ll Need
- Mixing bowls
- Electric mixer (hand or stand)
- Measuring cups and spoons
- Cookie scoop
- Piping bag (optional, for uniform shaping)
- Baking sheet
- Parchment paper
- Cooling rack
Ingredients You’ll Need
This list makes approximately 42 mini cookies:
- 1 cup (226g) unsalted butter, softened
- 3/4 cup (150g) granulated sugar
- 3/4 cup (165g) brown sugar, packed
- 2 large eggs
- 1 tsp vanilla extract
- 2 1/4 cups (280g) all-purpose flour
- 1 tsp baking soda
- 1/2 tsp salt
- 1 1/2 cups (255g) mini chocolate chips
Substitutions: A plant-based butter alternative works for a dairy-free version. Stick with mini chocolate chips if you can – standard-size chips tend to overwhelm a small dough portion and throw off the ratio. No mini chips on hand? Pulse regular ones in a food processor for a few seconds.
Ingredient Notes
Mini Chocolate Chips Smaller chips spread more evenly through small dough portions. Fewer cookies end up “winning” the chocolate lottery; more of them get an even share.
Unsalted Butter Room temperature is non-negotiable here. Too cold and it won’t aerate properly; melted, and you’ll get a flatter, denser cookie than intended.
Brown Sugar The molasses is what keeps things chewy – it holds onto moisture in a way granulated sugar simply doesn’t.
Vanilla Extract Pure extract over imitation, if the budget allows. In a recipe this short on ingredients, that one substitution is more noticeable than it would be in something more complicated.
Step-by-Step Recipe
Preparing the Dough
- Cream the softened butter with granulated sugar and brown sugar until light in color and texture, about 2-3 minutes.
- Add the eggs one at a time, then mix in the vanilla extract.
- In a separate bowl, whisk together the flour, baking soda, and salt. Fold this into the wet mixture until just combined, then fold in the mini chocolate chips.
Shaping the Cookies
- Chill the dough for at least 30 minutes. Skip this step and you’ll likely regret it – mini cookies spread more noticeably than full-size ones when the dough is too soft.
- Scoop portions of about 1/2 tablespoon each, or pipe them, onto a parchment-lined baking sheet, spacing them 1.5 inches apart.
Baking
- Preheat the oven to 350°F (175°C). Bake for 8-10 minutes, until the edges just start turning golden while the centers still look slightly underdone. Check the tray at the 7-minute mark – mini cookies go from “not quite done” to “overbaked” faster than you’d think.
Cooling
- Let the cookies sit on the tray for 2-3 minutes before moving them to a wire rack. Skipping this rest is how cookies fall apart on the way to the plate.
One more thing worth flagging: don’t crowd the tray. It’s tempting, since mini cookies take up less space, but crowding traps steam and softens the edges you just spent ten minutes baking.
Getting a Crispy Texture
Want crispy? A few adjustments make the difference:
- More granulated sugar, less brown sugar. Granulated sugar crisps; brown sugar’s moisture works against it.
- Flatten the dough slightly before baking. More surface area, more even crisping.
- Bake a minute or two longer than feels right. Mini cookies look underdone even when they’re finished – trust the timer, not the appearance.
- Cool on a wire rack, not the tray. A hot tray traps steam underneath and undoes the crisp base you just baked.
- Room-temperature butter, never melted. Melted butter spreads fast and bakes into something denser and flatter than intended.
Prefer chewy instead? Reverse all of it – more brown sugar, a slightly shorter bake, dough left unflattened. Sugar ratio is one of the more reliable levers for cookie texture, a point echoed in King Arthur Baking’s notes on sugar and cookie texture, and it’s borne out often enough in practice that it’s worth taking seriously rather than treating as a minor detail.
Before baking, the dough should hold its shape rather than look glossy or loose. Dough that spreads the moment it hits the spoon needs more time in the fridge – no shortcuts here.
Using a Piping Bag for Uniform Cookies
A piping bag isn’t strictly necessary, but it’s the fastest way to get identical-sized cookies, which means the whole tray bakes at the same rate instead of some finishing early and others lagging.
- Fill the bag with chilled dough, using a wide round tip or a zip-top bag with the corner trimmed.
- Pipe small, even portions – about the size of a cherry tomato – onto a parchment-lined tray.
- Space the portions roughly 1.5 inches apart. Even mild spreading is enough to merge cookies that are piped too close together.
No piping bag? A cookie scoop or spoon works fine. Consistency in size matters more than the tool. One quick check: piped dough should hold a rounded shape on the tray. If it flattens the second it touches the parchment, give it more time in the fridge before trying again.
Calories and Nutrition Facts
The table below gives an approximate breakdown per mini cookie, based on standard recipe proportions and figures consistent with USDA FoodData Central nutrition data for comparable baked goods.
| Nutrient | Amount (per mini cookie) |
|---|---|
| Calories | 35-45 kcal |
| Fat | 2g |
| Sugar | 2.5g |
| Carbohydrates | 5g |
| Protein | 0.4g |
Because mini cookies are naturally portion-controlled, you can eat several before hitting the calorie total of one large cookie. For a lighter version, cutting the sugar by about 20%, swapping part of the butter for unsweetened applesauce, or switching to dark chocolate chips are all reasonable options.
Nutrition values are estimates and will vary depending on the specific ingredients and brands used.
Storage
- Room temperature: An airtight container keeps cookies fresh for up to 5 days and preserves crispness better than the fridge does.
- Refrigeration: Skip it. It softens the texture more than it helps.
- Freezing baked cookies: Store cooled cookies in a freezer bag with parchment between layers for up to 3 months. Thaw at room temperature for 10-15 minutes before serving.
- Freezing dough: Portion the dough onto a tray, freeze until solid, then transfer to a freezer bag. Bake directly from frozen, adding 1-2 minutes to the bake time.
Lost some crispness after a day or two? A 3-4 minute reheat in a 300°F oven brings most of it back.
Common Mistakes to Avoid
- Overbaking or underbaking: Mini cookies bake fast enough that a minute of distraction can ruin a batch. Check early.
- Wrong dough consistency: Too warm and it spreads too much; too cold and it won’t spread enough. Thirty minutes of chilling usually gets it right.
- Overcrowded trays: Traps steam, softens the crisp texture you were going for.
- Skipping the cooling rest: Cookies moved straight from a hot tray to a plate tend to fall apart or stay slightly underset underneath.
Baking Tips Worth Remembering
- Chill the dough for at least 30 minutes before baking
- Use parchment paper, not a bare tray
- Rotate the tray halfway through baking for even color
- Pull the tray the moment the edges turn golden
- Cool cookies on a wire rack, not the baking sheet
Variations to Try
Once the base recipe feels familiar, these are worth testing:
- Mini Peanut Butter Cookies – replace 1/4 cup of butter with peanut butter.
- Double Chocolate Version – substitute 1/4 cup of the flour with cocoa powder.
- Holiday Mini Cookies – add red and green mini candy-coated chocolates alongside the chips.
- Gluten-Free Version – use a 1:1 gluten-free flour blend in place of all-purpose flour.
- Dairy-Free Version – use a plant-based butter alternative and dairy-free chocolate chips.
Related Recipes
If you enjoyed these bite-sized cookies, these are worth baking next:
- Soft and Chewy Dairy-Free Chocolate Chip Cookies – for a dairy-free version with a softer texture.
- Chocolate Chip Cookies Without Brown Sugar – a crisper alternative if brown sugar isn’t on hand.
- Crispy Chocolate Cookie Recipe – deeper chocolate flavor, more crunch.
- Dairy-Free Chocolate Chip Cookies – another dairy-free option with a different texture.
- Cookies Without Milk – useful if milk specifically is what you’re avoiding.
- Lactose-Free Cookies – for lactose sensitivity rather than a full dairy-free diet.
Frequently Asked Questions
Recipe and Baking Questions
How many calories are in mini chocolate chip cookies? A single mini chocolate chip cookie has approximately 35-45 calories, depending on the recipe and chip content.
Can I make mini chocolate chip cookies without a piping bag? Yes. A cookie scoop or teaspoon works just as well, as long as the portions stay consistent.
How do I keep mini chocolate chip cookies crispy? More granulated sugar than brown sugar, no overcrowding on the tray, and cooling on a wire rack instead of the baking sheet.
What size should mini chocolate chip cookies be? About the size of a cherry tomato before baking — roughly 1/2 tablespoon of dough per cookie, which becomes a 1-1.5 inch cookie once baked.
Why did my mini cookies spread too much? Usually not enough chilling time, or butter that was too soft or melted. Chill the dough fully and use room-temperature butter, and the spreading issue tends to resolve itself.
Storage and Substitution Questions
Can I freeze mini chocolate chip cookie dough? Yes. Freeze portioned dough balls on a tray until solid, then move them to a freezer bag. Bake directly from frozen, adding 1-2 minutes to the bake time.
How long do mini chocolate chip cookies stay fresh? Up to 5 days in an airtight container at room temperature. Freezing baked cookies extends that to about 3 months.
Can I use regular chocolate chips instead of mini chips? You can, though the chocolate won’t distribute as evenly. Pulsing regular chips briefly in a food processor gets you close.
Final Thoughts
Once the dough consistency and timing are dialed in, mini chocolate chip cookies come together quickly and work for both everyday snacking and larger gatherings. The adjustments above cover most of what affects texture, whether the goal is a crisp edge or a softer bite.
Baked a batch? A rating or a quick note on which variation you tried helps other readers figure out what to make next.