
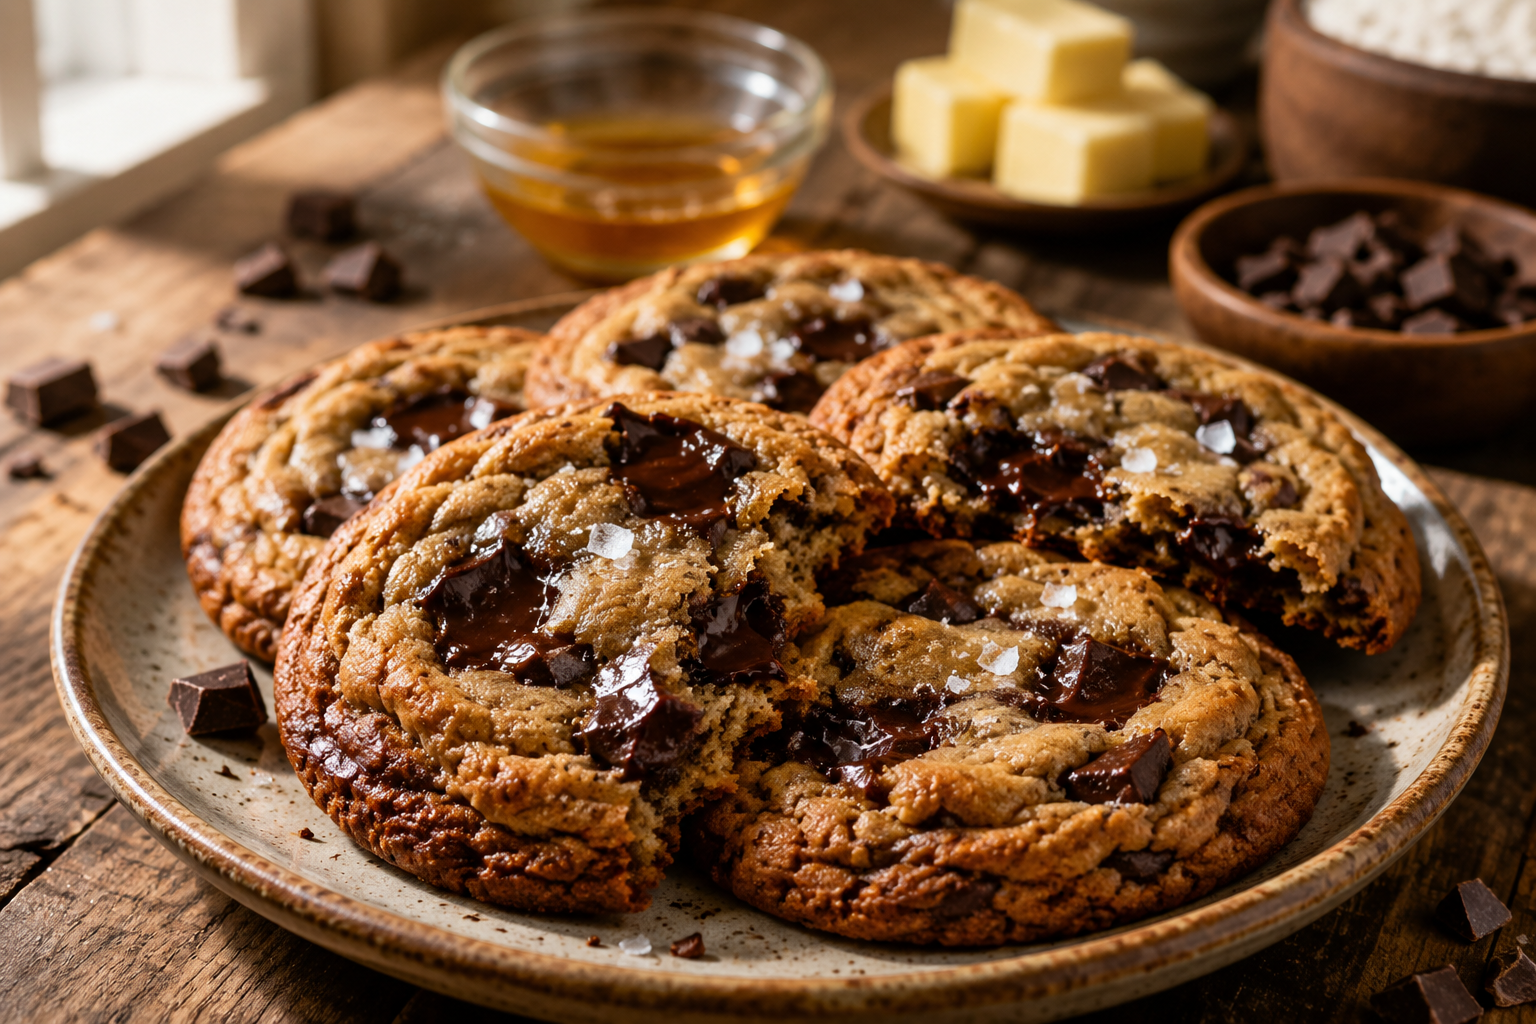
The first time I browned butter for chocolate chip cookies, I almost gave up halfway through. I stood at the stove longer than I wanted to, waiting for something to happen, convinced I’d ruined a perfectly good stick of butter. Then, in about ninety seconds, it turned – the foam settled, the color deepened to amber, and the kitchen filled with a smell somewhere between toasted hazelnuts and caramel. That was the moment I finally understood why so many bakers swear these are the only chocolate chip cookies worth making anymore.
However, brown butter chocolate chip cookies aren’t a gimmick. Browning the butter drives off water and toasts the milk solids, which in turn builds a nutty, caramel-like depth that regular melted or softened butter simply can’t produce. Combined with a mix of light and dark brown sugar, these cookies come out with crisp, lacy edges, a chewy center, and a flavor that tastes more “bakery” than “home kitchen” – all without any exotic ingredients.
This recipe makes about 22–24 cookies, takes roughly 20 minutes of active prep plus chilling time, and bakes in under 15 minutes per tray – so budget an hour or two total if you chill the dough properly (and you should).
Quick Recipe Overview
📋 Recipe Card
- Author: CookieBari
- Prep Time: 20 minutes (plus 30 min–24 hr chilling)
- Cook Time: 12 minutes per tray
- Total Time: ~1 hour (with minimum chill)
- Yield / Servings: 22–24 cookies (serving size: 1 cookie)
- Calories: 175 kcal per cookie
- Category: Dessert / Cookies
- Method: Baking
- Cuisine: American
- Keywords: brown butter chocolate chip cookies, brown butter cookies, chewy chocolate chip cookies, brown butter toffee cookies
- Video: (add a browning-butter or mixing-process video/GIF here if available – strengthens both UX and schema eligibility)
Why Brown Butter Changes Everything
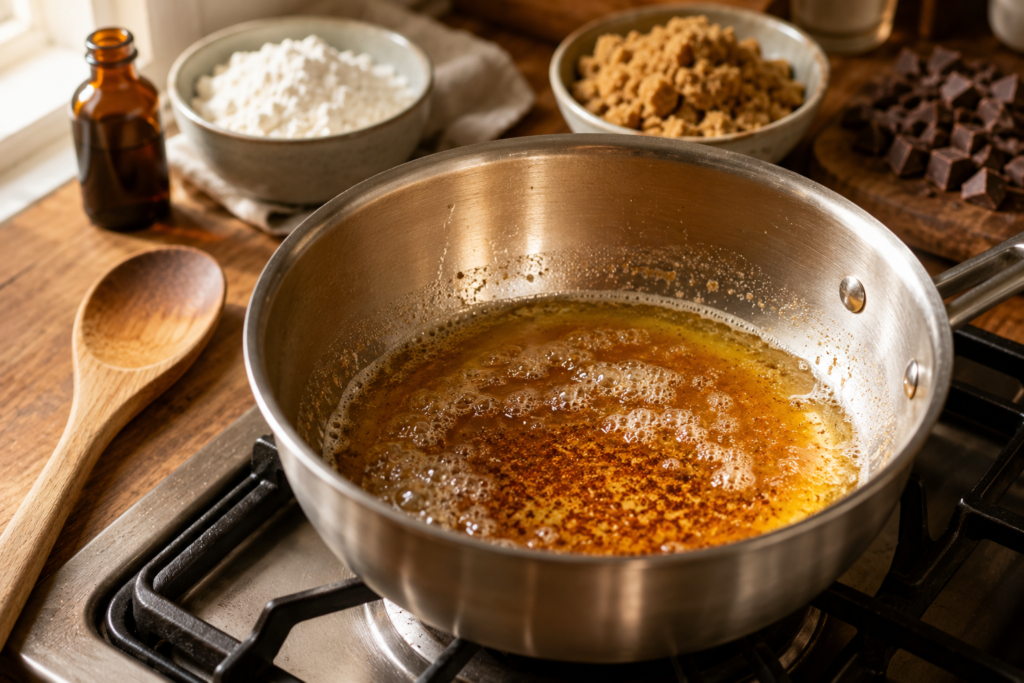
Butter is roughly 80% fat, and the rest is water and milk solids. When you melt butter normally, those milk solids stay suspended and remain mostly flavorless. When you brown butter, however, you’re cooking off the water and toasting the proteins and sugars in the milk solids – a Maillard reaction, the same chemistry that gives seared steak or toasted bread their depth. As a result, the butter tastes nutty and slightly caramelized, and it’s also more concentrated, because you’ve evaporated some of the water weight along the way. King Arthur Baking’s guide to browning butter breaks down this process in more visual detail, and Serious Eats has a deeper explanation of the science behind browned butter for anyone curious about the exact chemistry at play.
For chocolate chip cookies specifically, this means:
- Deeper flavor without adding a single new ingredient
- Chewier texture, since browning changes the fat-to-liquid ratio in the dough
- Better browning on the cookie itself, thanks to the extra sugar-protein reaction already underway in the butter
If you’ve already tried our thick chocolate chip cookies or crispy chocolate chip cookies, think of this version as the flavor-forward middle ground – chewy like the thick version, but with a toasted depth neither of those recipes has.
Regular vs. Melted vs. Brown Butter – How They Compare
| Butter Type | Flavor | Texture | Best For |
|---|---|---|---|
| Cold/Softened Butter | Mild, buttery | Soft, cakey | Classic soft cookies |
| Melted Butter | Rich, buttery | Chewy, dense | Chewy chocolate chip cookies |
| Brown Butter | Nutty, caramelized | Chewy with crisp edges | Bakery-style, deep-flavor cookies |
Ingredients You’ll Need
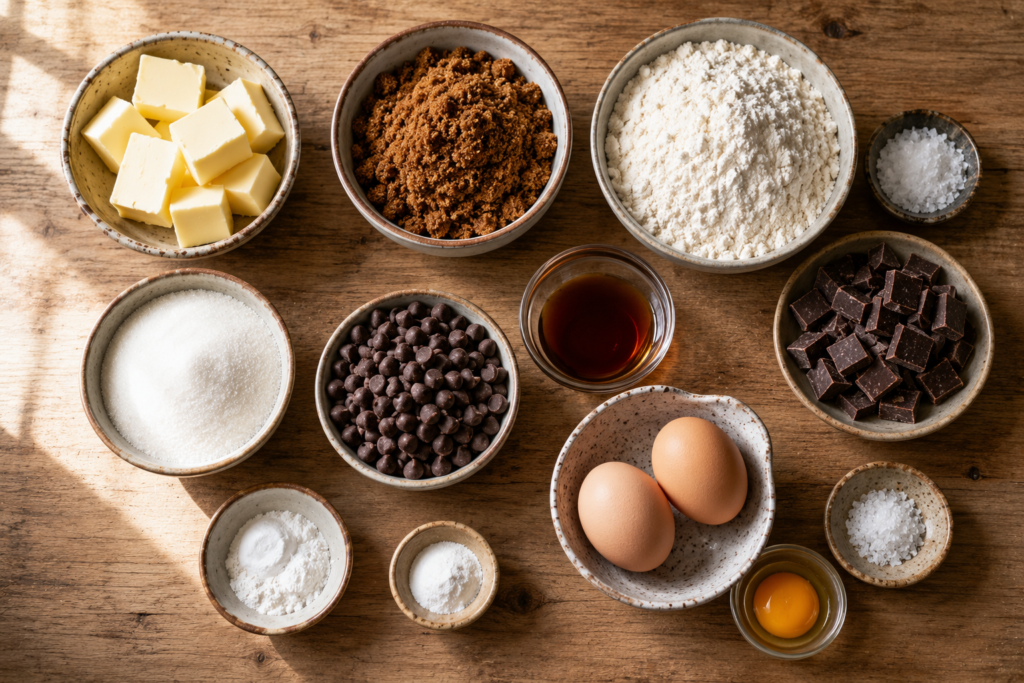
Makes 22–24 cookies
- 1 cup (226 g) unsalted butter (browning concentrates flavor, so unsalted keeps you in control of saltiness)
- ¾ cup (165 g) dark brown sugar, packed (the extra molasses note pairs beautifully with the browned butter)
- ½ cup (100 g) granulated sugar, for edge crispness
- 2 large eggs, plus 1 extra egg yolk, for chewiness
- 2 tsp vanilla extract, added generously since brown butter can handle a stronger vanilla presence
- 2 ¼ cups (280 g) all-purpose flour
- 1 tsp baking soda
- ¼ tsp baking powder
- 1 tsp fine sea salt, plus flaky salt for finishing
- 1 ½ cups (255 g) semi-sweet chocolate chips or chopped chocolate chunks (chunks melt into better pools)
How to Brown Butter Without Burning It
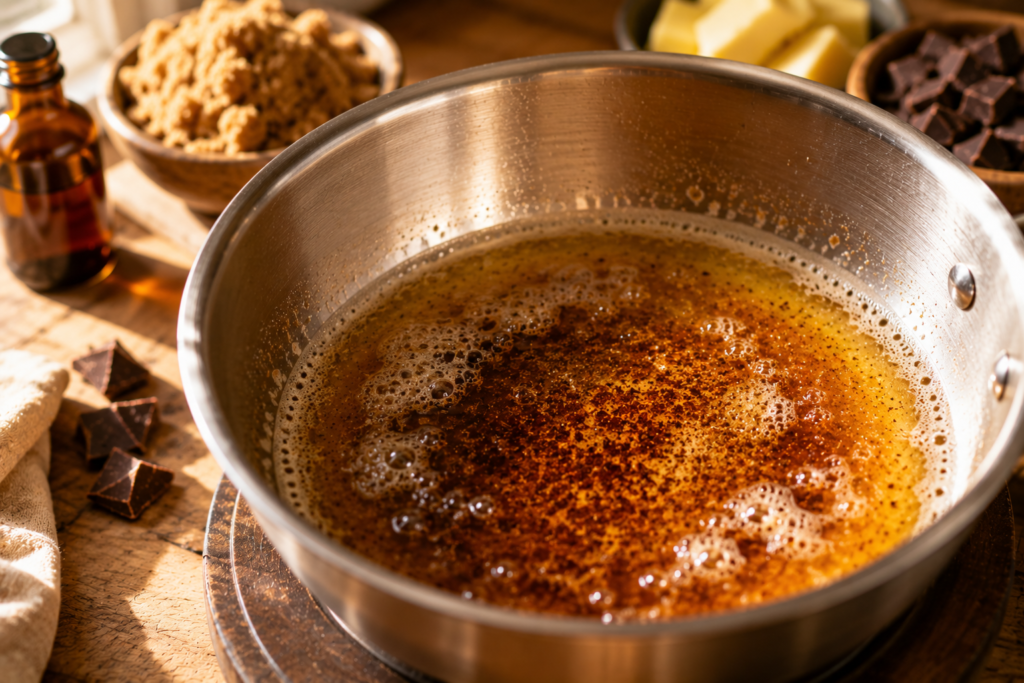
This is the step people fear most, but it’s actually simple once you know the visual cues.
- First, melt the butter in a light-colored pan over medium heat – light-colored so you can actually see the color change.
- It will foam vigorously at first; that’s simply the water cooking off. Meanwhile, swirl the pan occasionally.
- Once the foam subsides, watch closely, since small brown flecks (the toasted milk solids) will start forming at the bottom.
- As soon as it smells nutty and turns amber-gold, pull it off the heat immediately and pour it into a heatproof bowl – otherwise, the residual heat in the pan will keep cooking it.
Overall, the difference between perfectly browned and burnt butter is often less than 30 seconds, so stay at the stove throughout.
👨🍳 Pro Baker Tip: Weigh your browned butter after it cools. Browning evaporates water, so if you’ve lost more than about 15–20 g from the original 226 g, whisk in a teaspoon or two of milk to restore the original liquid balance – this keeps your results consistent every time you make this recipe, even across different stoves or pan types.
🍪 CookieBari Tip: For perfectly round, bakery-style cookies, gently swirl a large round cutter (or a wide-mouthed glass) around each cookie immediately after baking, while they’re still hot and slightly soft. This nudges any uneven edges back into a clean circle without needing to reshape the dough beforehand.
Equipment You’ll Need
- A light-colored saucepan (so you can see the butter change color)
- A stand mixer or hand mixer with a large bowl
- Baking sheets lined with parchment paper
- A cookie scoop (about 2 tablespoons per cookie) for even sizing
Step-by-Step Method
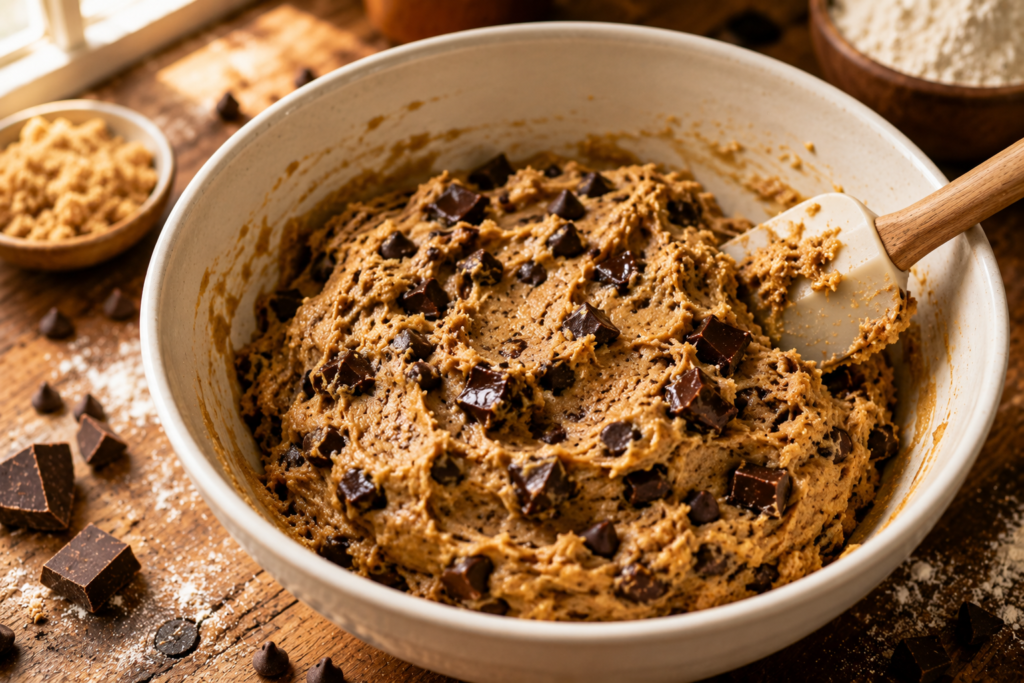
Making the Dough
- Brown the butter. Melt the 1 cup of butter in a light-colored saucepan as described above, then pour it into a heatproof bowl and let it cool for about 10–15 minutes, so it won’t scramble the eggs.
- Whisk the sugars into the warm brown butter. Add the dark brown sugar and granulated sugar directly into the cooled brown butter, whisking until the mixture looks glossy and slightly grainy, about 1 minute.
- Next, add the eggs, yolk, and vanilla. Whisk in the 2 eggs, extra yolk, and vanilla extract until the batter lightens in color and thickens slightly – this step builds chew, so don’t rush it.
- After that, fold in the dry ingredients. Sift the flour, baking soda, baking powder, and salt together, then fold into the wet mixture just until no streaks remain. Overmixing here builds too much gluten and toughens the cookie.
- Finally, stir in the chocolate. Fold in the chocolate chips or chunks, saving a handful to press onto the tops of the dough balls for that bakery-style look.
- Chill the dough. Cover and refrigerate for at least 30 minutes, ideally 2–24 hours. Since chilling firms the fat back up, the cookies spread less and bake with a thicker, chewier structure as a result.
Baking and Finishing
- Portion and bake. Scoop 2-tablespoon balls of dough onto a parchment-lined baking sheet, spacing them 2 inches apart. Bake at 350°F (175°C) for 11–13 minutes, until the edges are set and golden but the centers still look slightly underbaked. They’ll finish setting on the tray as they cool.
- Finish with flaky salt. Sprinkle it on the moment the cookies come out of the oven, while the surface is still soft enough for it to stick.
- Cool before serving. Let the cookies rest on the baking sheet for 5 minutes before transferring to a wire rack – moving them too early can cause breakage since the centers are still soft.
How to Tell When They’re Done
The edges should look set, matte, and lightly golden, while the centers still look pale and slightly wet or underdone. This is intentional: carryover heat from the hot baking sheet finishes cooking the centers after you pull the tray out. If, on the other hand, you wait until the centers look fully baked in the oven, the cookies will end up overbaked and dry once they cool.
Troubleshooting Table
| Problem | Likely Cause | Fix |
|---|---|---|
| Cookies spread too much / too thin | Dough or butter was too warm | Chill dough at least 30 min–2 hrs before baking |
| Cookies came out dry or tough | Overbaked, or dough overmixed | Bake less (pull at slightly underdone centers); mix dry ingredients just until combined |
| Brown butter smells burnt | Heat too high, or left on stove too long | Use medium heat; pull off heat the moment it smells nutty |
| Eggs look scrambled in the batter | Brown butter was still too hot when added | Cool brown butter 10–15 minutes before mixing in eggs |
| Cookies taste flat or one-note | All light brown sugar used, no dark brown sugar | Use at least half dark brown sugar for molasses depth |
| Cookies too greasy or oily-looking | Butter not fully incorporated, or too warm dough | Chill dough longer; make sure sugar-butter mixture looks glossy, not separated |
Variations Worth Trying
- Brown butter and toffee bits – swap half the chocolate chips for chopped toffee bits (like Heath or Skor pieces) for a buttery, crunchy contrast that pairs especially well with the browned butter’s caramel notes
- Brown butter and sea salt caramel chips for an extra hit of caramel depth
- Toasted pecans or walnuts, which echo the nuttiness of the browned butter
- Espresso powder (about ½ teaspoon) to intensify the toasty, roasted notes without adding coffee flavor
- Half dark chocolate, half milk chocolate for a more layered sweetness
- Brown butter and oatmeal – swap ¾ cup of the flour for old-fashioned oats for a heartier, chewier bite, similar in spirit to our dairy free oatmeal cookies but with the brown butter upgrade
- Mini chocolate chip version – use mini chips instead of chunks for smaller, more evenly distributed pockets of chocolate, similar to our mini chocolate chip cookies
- Dairy-free adaptation – if you need to skip dairy entirely, a plant-based butter alternative can be browned the same way; check our dairy free cookies and dairy free cookie dough guides for brand recommendations that brown well
- No brown sugar on hand? – see our chocolate chip cookies without brown sugar post for a swap ratio, though we’d still recommend at least some dark brown sugar here for the fullest flavor
Storage Tips
Store baked cookies in an airtight container at room temperature for up to 5 days – a slice of bread in the container helps keep them soft. Meanwhile, unbaked dough balls freeze beautifully for up to 3 months in a sealed freezer bag; simply bake straight from frozen, adding 1–2 extra minutes to the bake time. Baked cookies also freeze well for up to 2 months – just thaw at room temperature for about 20 minutes before serving.
Nutrition Facts (Per Cookie, approximate)
Based on a yield of 24 cookies. Values are estimates and will vary depending on exact brands and portion sizes used.
| Nutrient | Amount |
|---|---|
| Calories | 175 kcal |
| Total Fat | 9 g |
| Saturated Fat | 5 g |
| Cholesterol | 30 mg |
| Sodium | 105 mg |
| Total Carbohydrates | 22 g |
| Dietary Fiber | 0.5 g |
| Sugars | 14 g |
| Protein | 2 g |
Note: These figures are estimated using standard nutrition calculators and are provided for general guidance only – not a substitute for calculations based on your exact ingredient brands. Ingredient-level values were cross-checked against USDA FoodData Central for accuracy. If precise nutrition data matters for your readers (e.g., diabetic or calorie-tracking audiences), recalculate using your recipe plugin’s built-in nutrition calculator once final ingredient brands are locked in.
Frequently Asked Questions
Can I use salted butter? Yes, just omit or reduce the added salt in the recipe to avoid an overly salty cookie, since browning concentrates flavors including saltiness.
Why did my brown butter cookies spread too much? Usually it’s a dough temperature issue – either the butter wasn’t cooled enough before mixing, or the dough wasn’t chilled long enough before baking.
Can I brown the butter ahead of time? Absolutely. Brown a batch and refrigerate it for up to a week; just bring it back to a soft, spreadable consistency before mixing the dough.
Do I need to chill the dough, or can I skip it? You can skip it if you’re short on time, but the cookies will spread thinner and bake up flatter and crisper rather than thick and chewy. For the bakery-style texture described in this recipe, chilling is worth the wait.
Why does my brown butter smell burnt instead of nutty? This usually means the heat was too high or the butter was left on the stove a few seconds too long after the milk solids started browning. Use medium (not medium-high) heat and pull the pan the moment you smell a nutty aroma, not after.
Can I make these cookies gluten-free? Yes – a 1:1 gluten-free all-purpose flour blend generally works well in this recipe, though the texture may be slightly more delicate. Chill the dough a little longer (closer to 2 hours) to help it hold together during baking.
Final Thoughts
Overall, brown butter chocolate chip cookies take maybe five extra minutes compared to a standard recipe, but the flavor payoff is the kind that gets people asking what your secret ingredient is. Once you’ve made a batch, it’s genuinely hard to go back to plain melted butter again.
In fact, after testing this recipe multiple times with different butter brands, sugar ratios, and chilling times, I found that chilling the dough overnight consistently produced the thickest cookies with the deepest, most rounded flavor – the extra wait genuinely changes the result, not just the texture but also how pronounced the toasted-butter taste comes through. So, if you only make one change to a standard chocolate chip cookie recipe, let it be this one.